Air travel is one of the most popular ways to get around these days. With the dramatic rise in flights, ensuring safety and avoiding collisions in the skies has become absolutely critical.
That’s where an international standard called ADS‑B comes in. It’s the same system that lets anyone follow air traffic using apps and websites like FlightRadar.
How ADS‑B Works
ADS‑B (Automatic Dependent Surveillance‑Broadcast) allows an aircraft to transmit its position, obtained via GNSS, along with other essential data to any receiver capable of decoding the signal. This means airports, other planes, and soon even us can monitor air traffic. All this information is broadcast over the 1090MHz frequency.

Don’t confuse ADS‑B with its predecessor, primary radar. Primary radar sends out a signal that bounces off an aircraft, revealing its location but nothing more. It works even when the aircraft lacks a transponder. In contrast, ADS‑B is more cost‑effective and covers a wider area while providing a wealth of additional data about the aircraft. Primary radar is still used as a backup and for tracking non-cooperative targets 🏴☠️.
Building Your ADS‑B Station
The plan is to install Pi24, a Linux‑based system built on Raspberry Pi OS Lite, which automates the reception of ADS‑B data, processes it, and sends it off to FlightRadar’s servers. This setup lets you view detected aircraft either directly on your Raspberry Pi or right on FlightRadar. By sharing your data, you contribute to global flight tracking, and in return, FlightRadar will hook you up with a Business subscription worth $500 a year!
Hardware Components
To set up your ADS‑B station, you’ll need three main components:
- A Raspberry Pi with an SD card of at least 8GB
- An SDR dongle receiver
- An antenna tuned for 1090MHz
On the Raspberry Pi side, check out this list to see which models are compatible with Pi24. I opted for a Raspberry Pi Zero 2 W for its compact size.
For the receiver, a simple SDR dongle will do the job, in my case, I used the RTL‑SDR V4.
Finally, when it comes to the antenna, you can buy a ready‑made one like this, but here we’re building our very own ground plane quarter‑wave antenna, just like we discussed in this lesson.
For the receiver, a simple SDR dongle will do the job, in my case, I used the RTL‑SDR V4.
Finally, when it comes to the antenna, you can buy a ready‑made one like this, but here we’re building our very own ground plane quarter‑wave antenna, just like we discussed in this lesson.
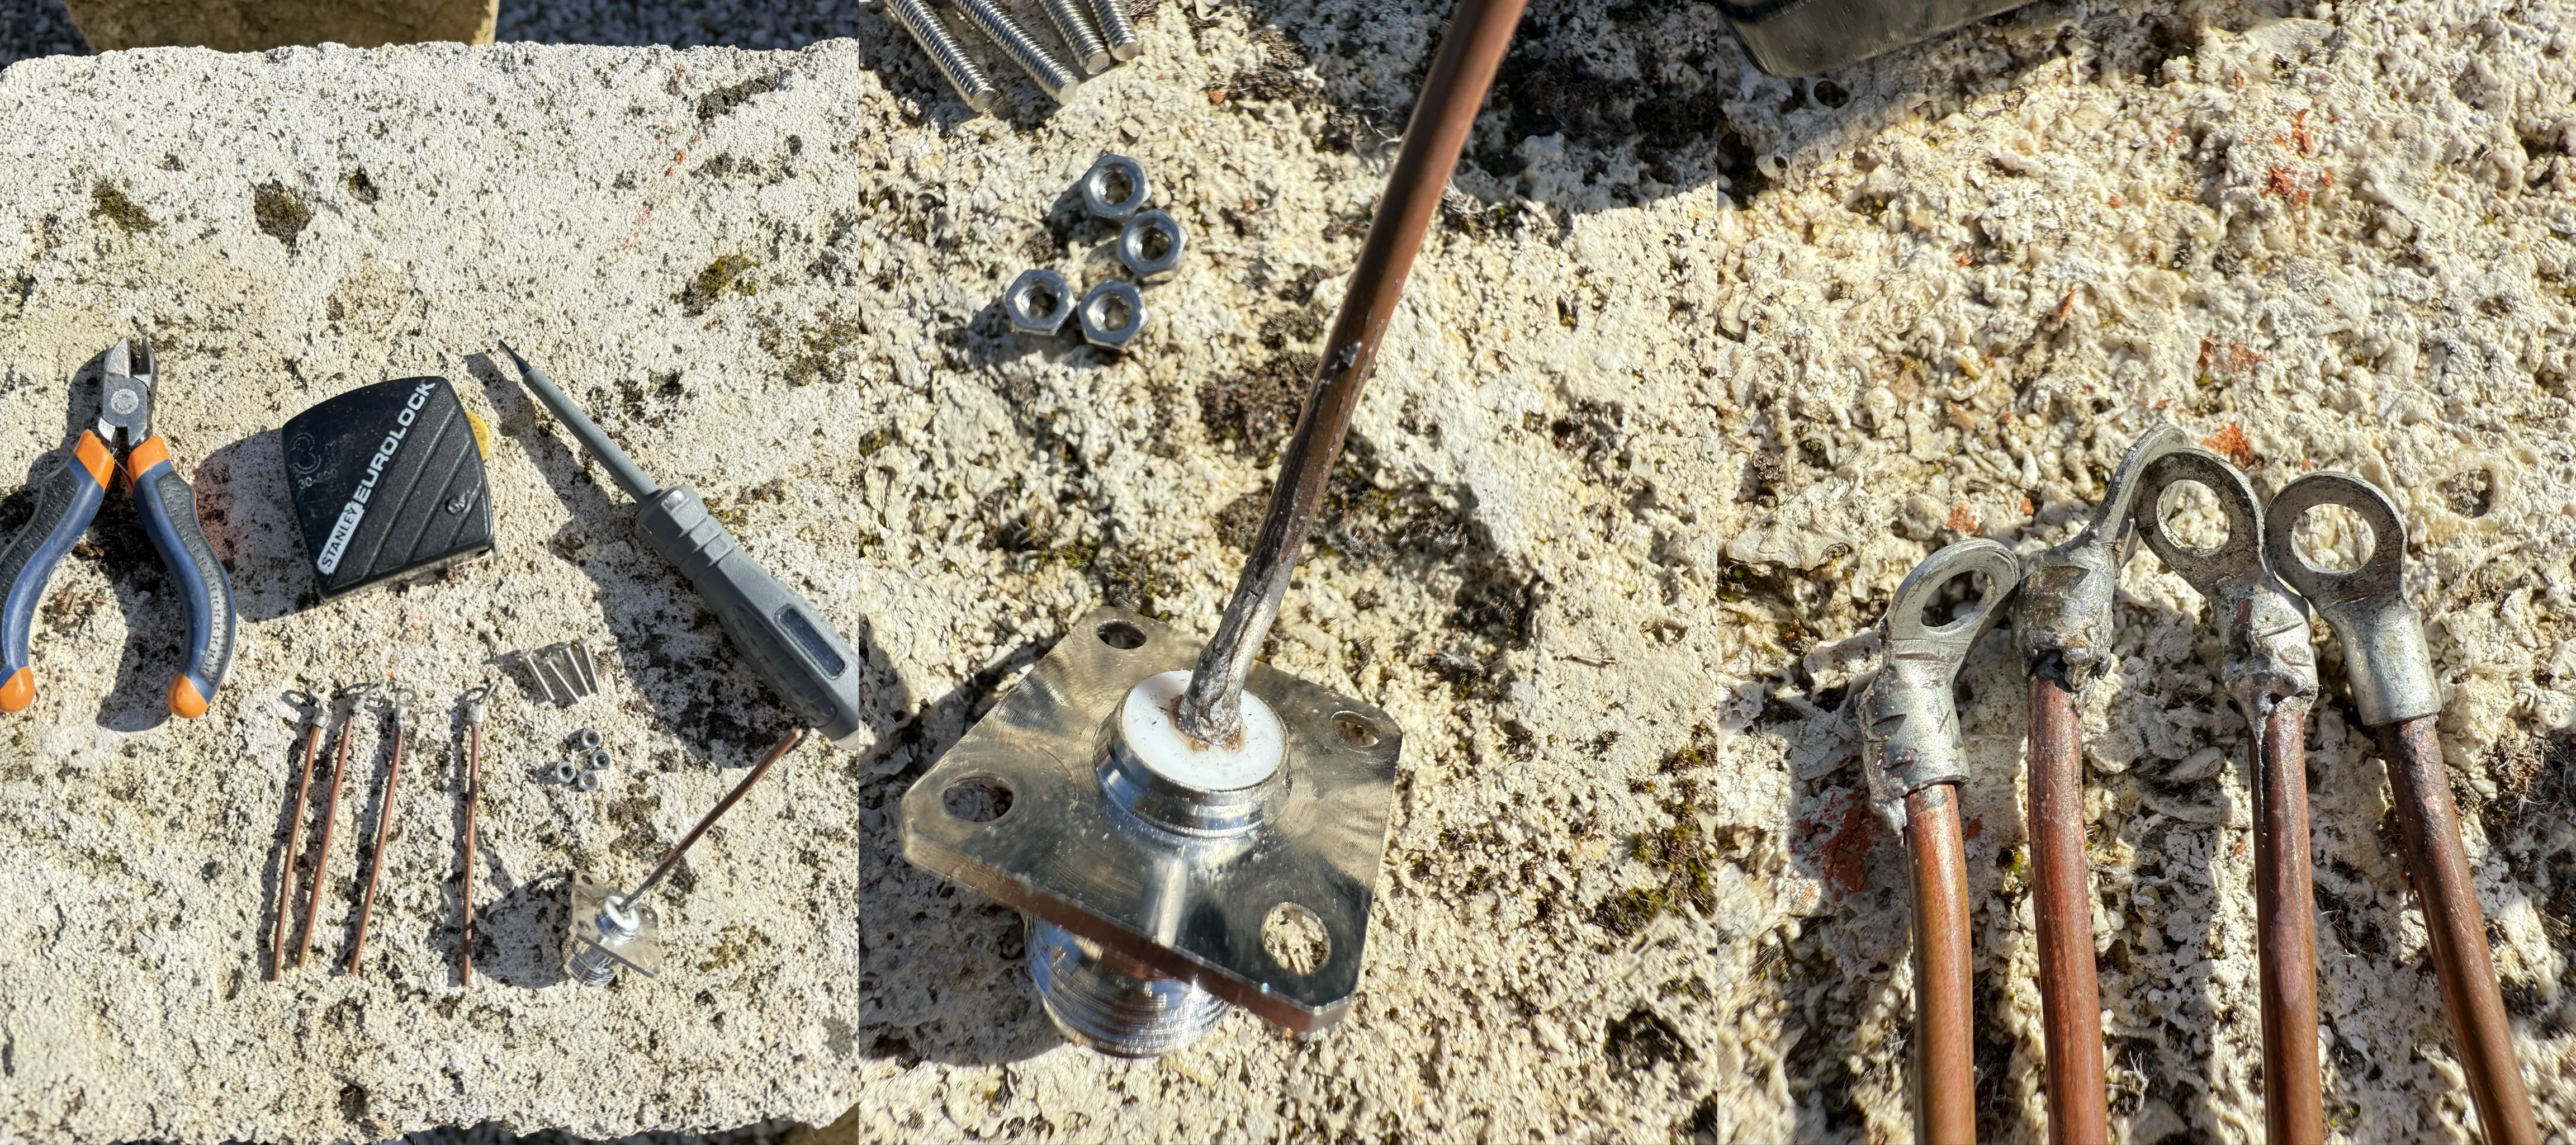
To figure out the exact dimensions, use this calculator, which tells you you'll need one rod of 6.5cm along with four others measuring 7.3cm each.
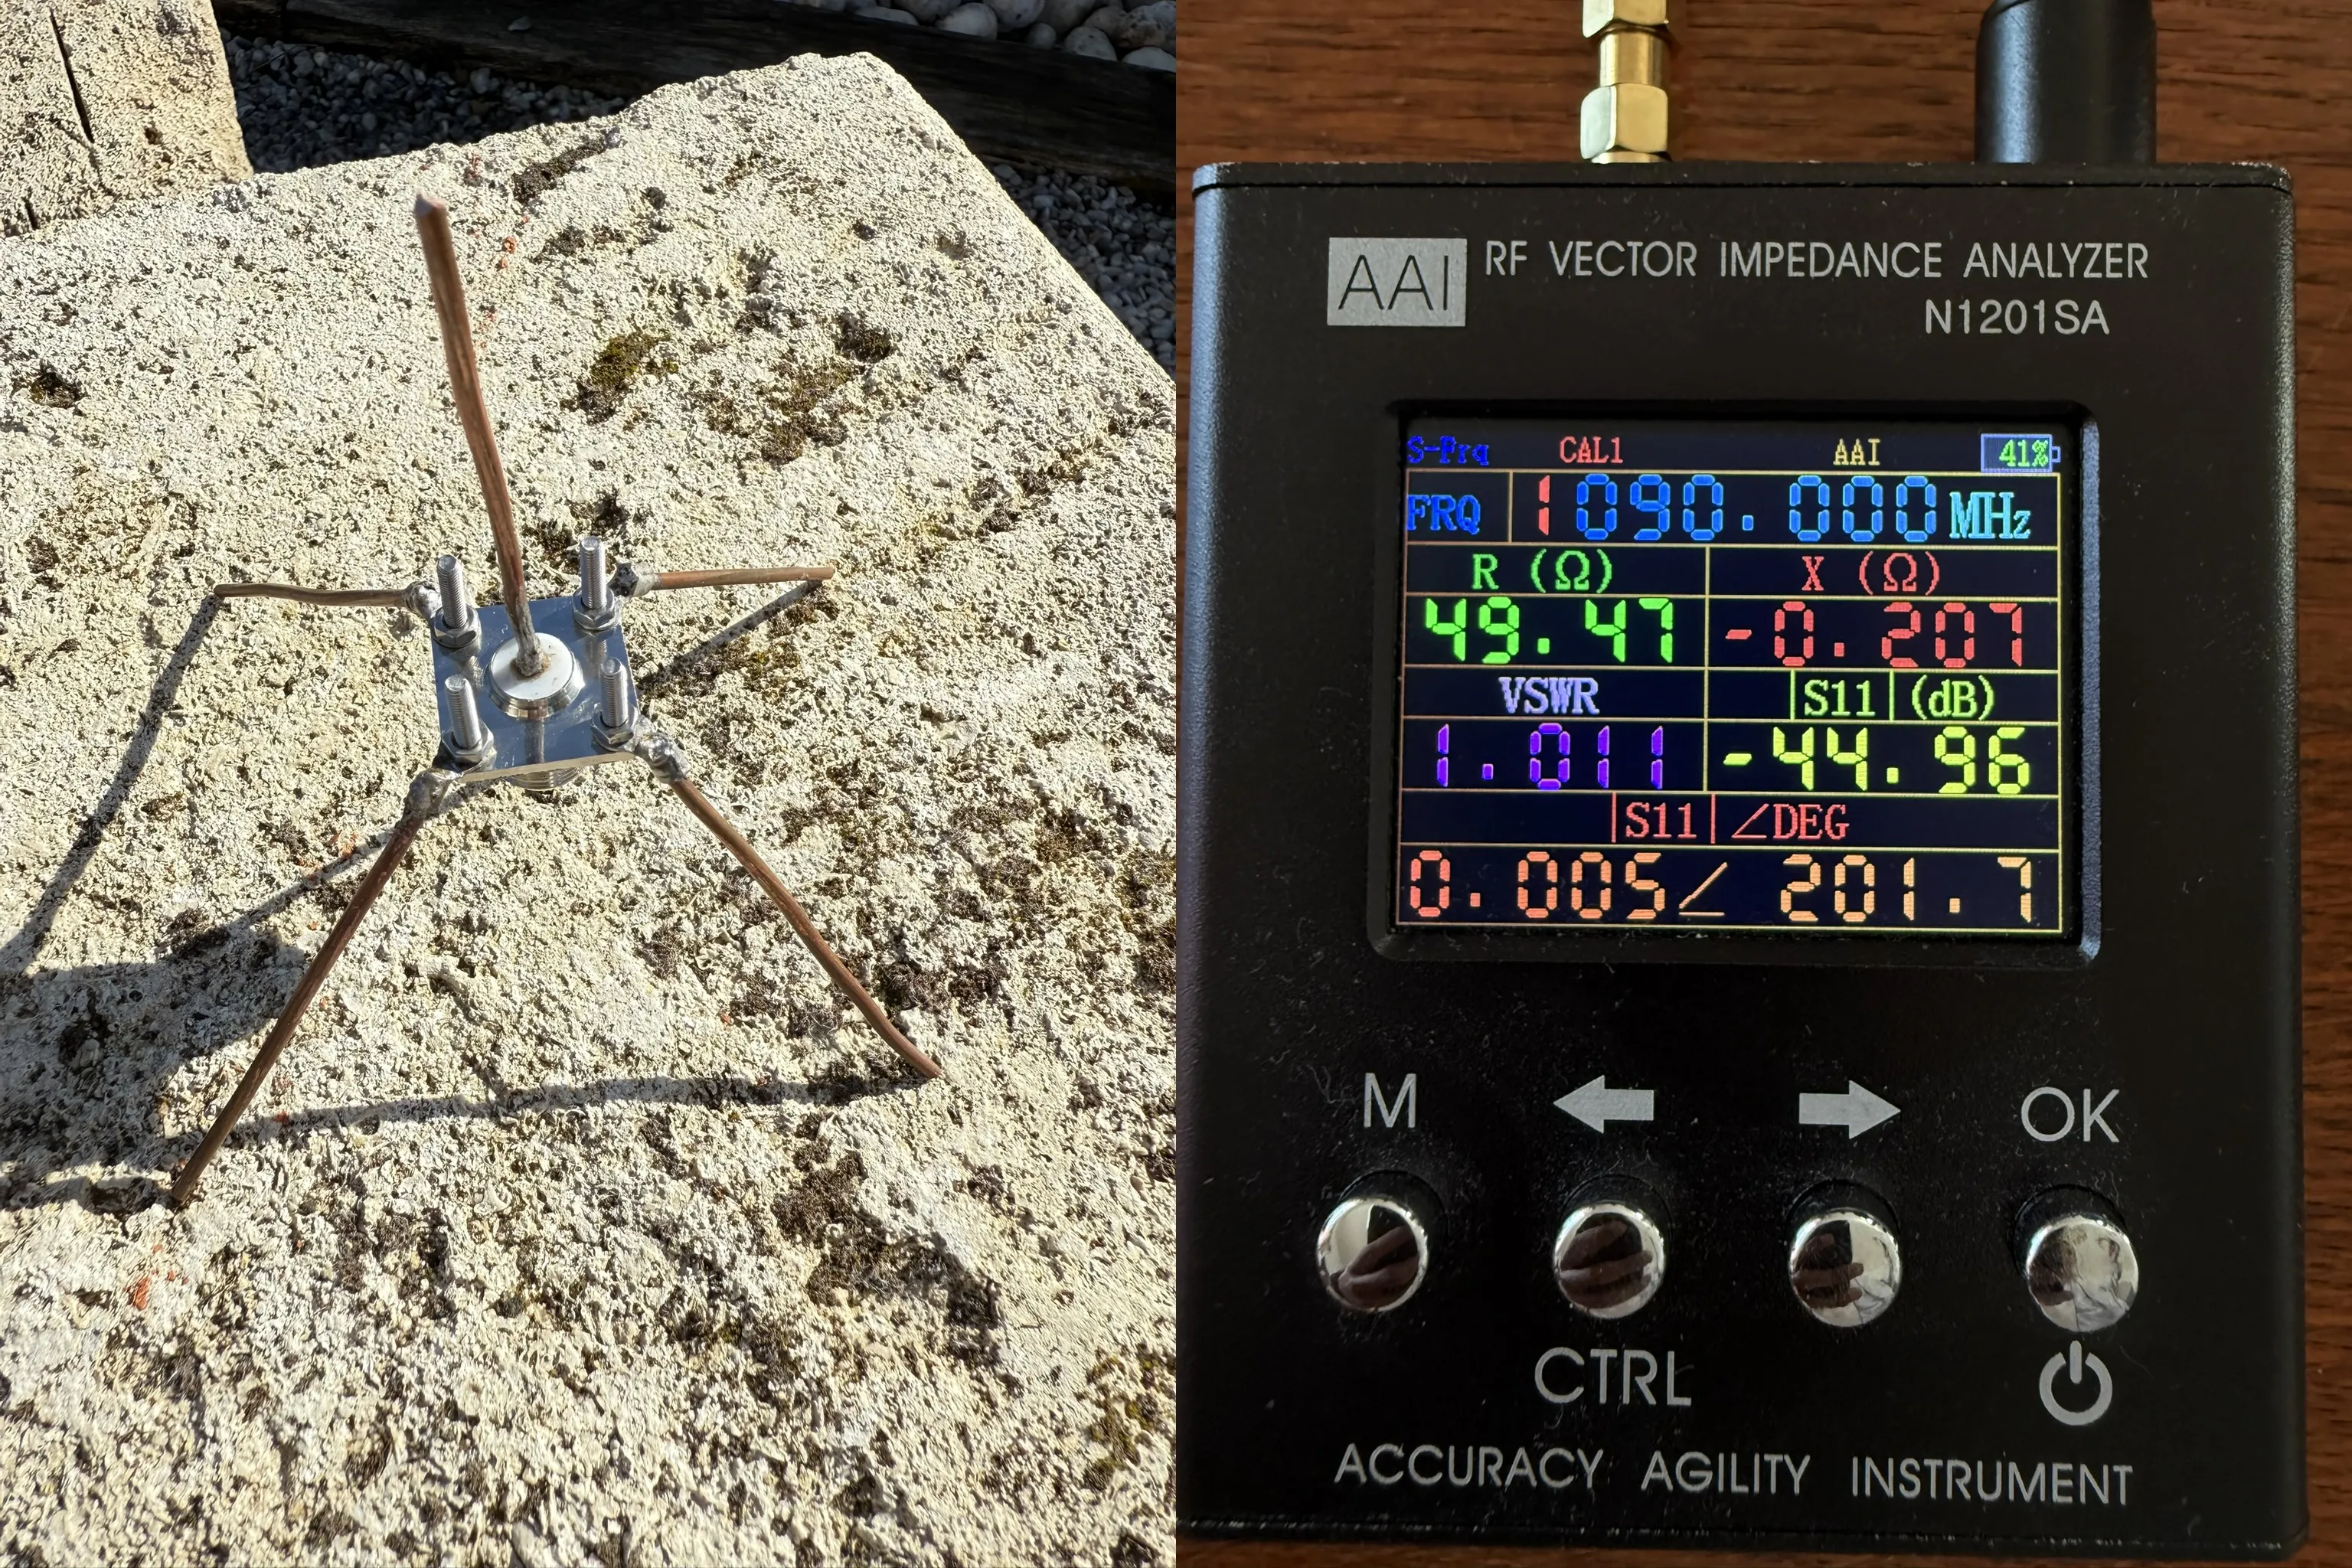
You should end up with something like this:

For the build, I stripped the plastic off some round connectors and soldered one onto each of the four copper rods. The central piece is soldered directly onto a component similar to this.
I set everything up and ended up with an awesome antenna that delivers excellent performance. Just a reminder: the SWR should be as close as possible to 1, and the impedance should be around 50Ω.
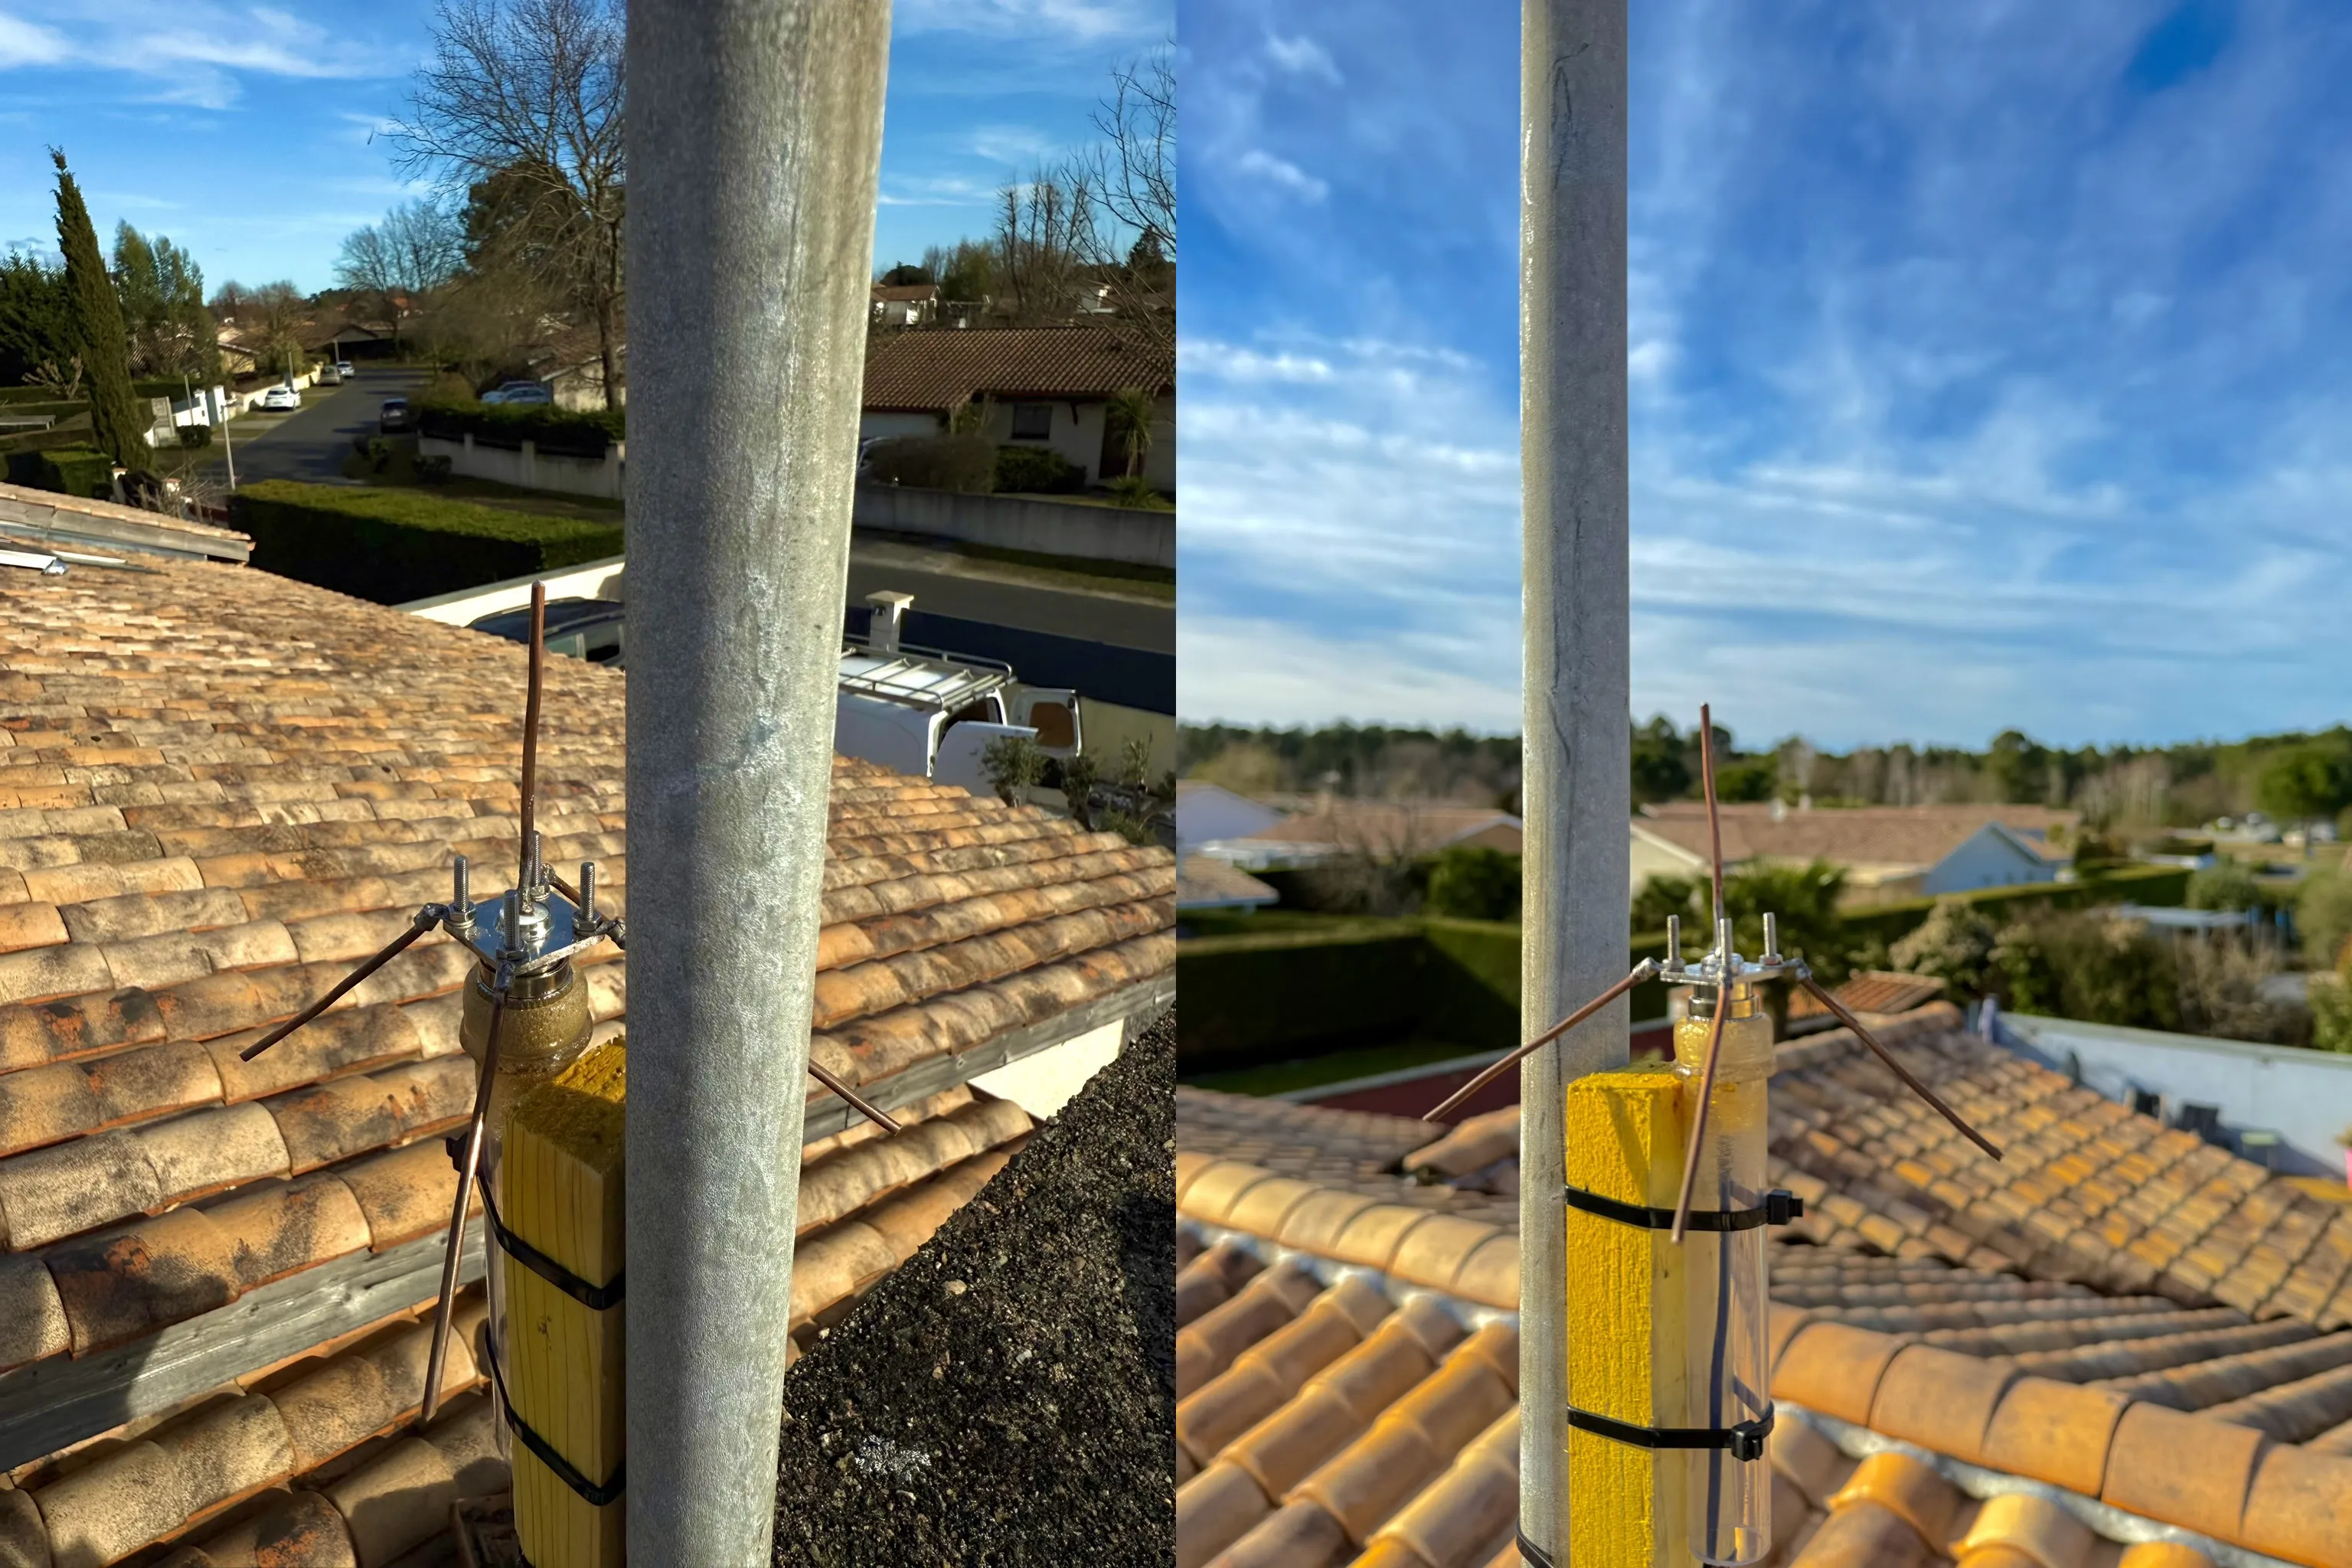
Now, all that's left is to mount it optimally on your roof. In my case, the setup was only temporary until I found a better solution.
Now, let's move on to the software part :)
Software Part
First, download the PI24 image and use a tool like Etcher to write it onto your SD card.
Once your SD card is inserted and formatted, unzip the Pi24 image (so that only the file
fr24-raspberry-pi-latest.img remains), launch Etcher, select your image, choose your SD card as the target, and hit Flash.
When finished, don’t eject the SD card yet if you can’t connect an Ethernet cable to your Pi. You’ll need to configure your Wi‑Fi first. Open the SD card on your computer and locate the file named
wpa_supplicant.conf.template. Rename it to wpa_supplicant.conf, open it, and fill in your Wi‑Fi details:# Remember to rename this file to wpa_supplicant.conf (remove the .template part!)
ctrl_interface=DIR=/var/run/wpa_supplicant GROUP=netdev
network={
ssid="YOUR_SSID" # Replace with your Wi‑Fi name
psk="YOUR_WIFI_PASSWORD" # Replace with your Wi‑Fi password
key_mgmt=WPA-PSK
}
Now, eject the SD card and insert it into your Raspberry Pi. Once you’ve hooked up your antenna to the SDR receiver (which in turn is connected to your Pi), power it on.
After booting up, create a FlightRadar account and visit this link which will automatically detect your Pi24 and prompt you to register it. If all goes well, you should see a page like this:
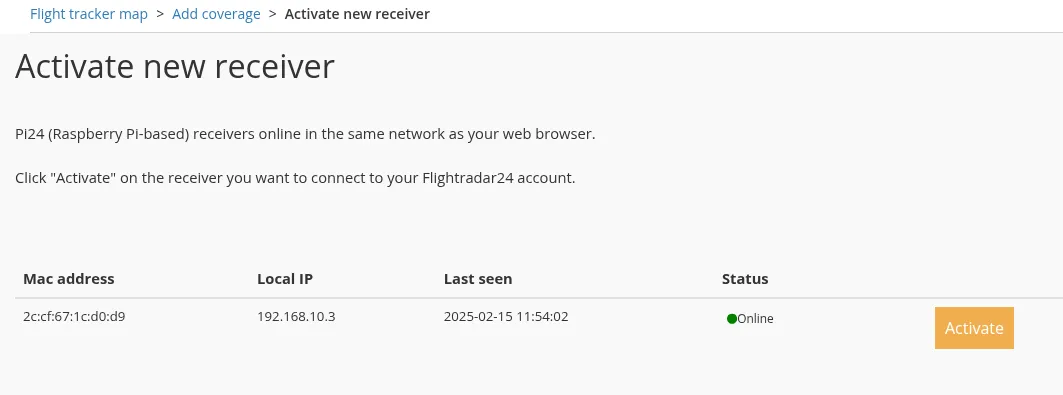
Click on
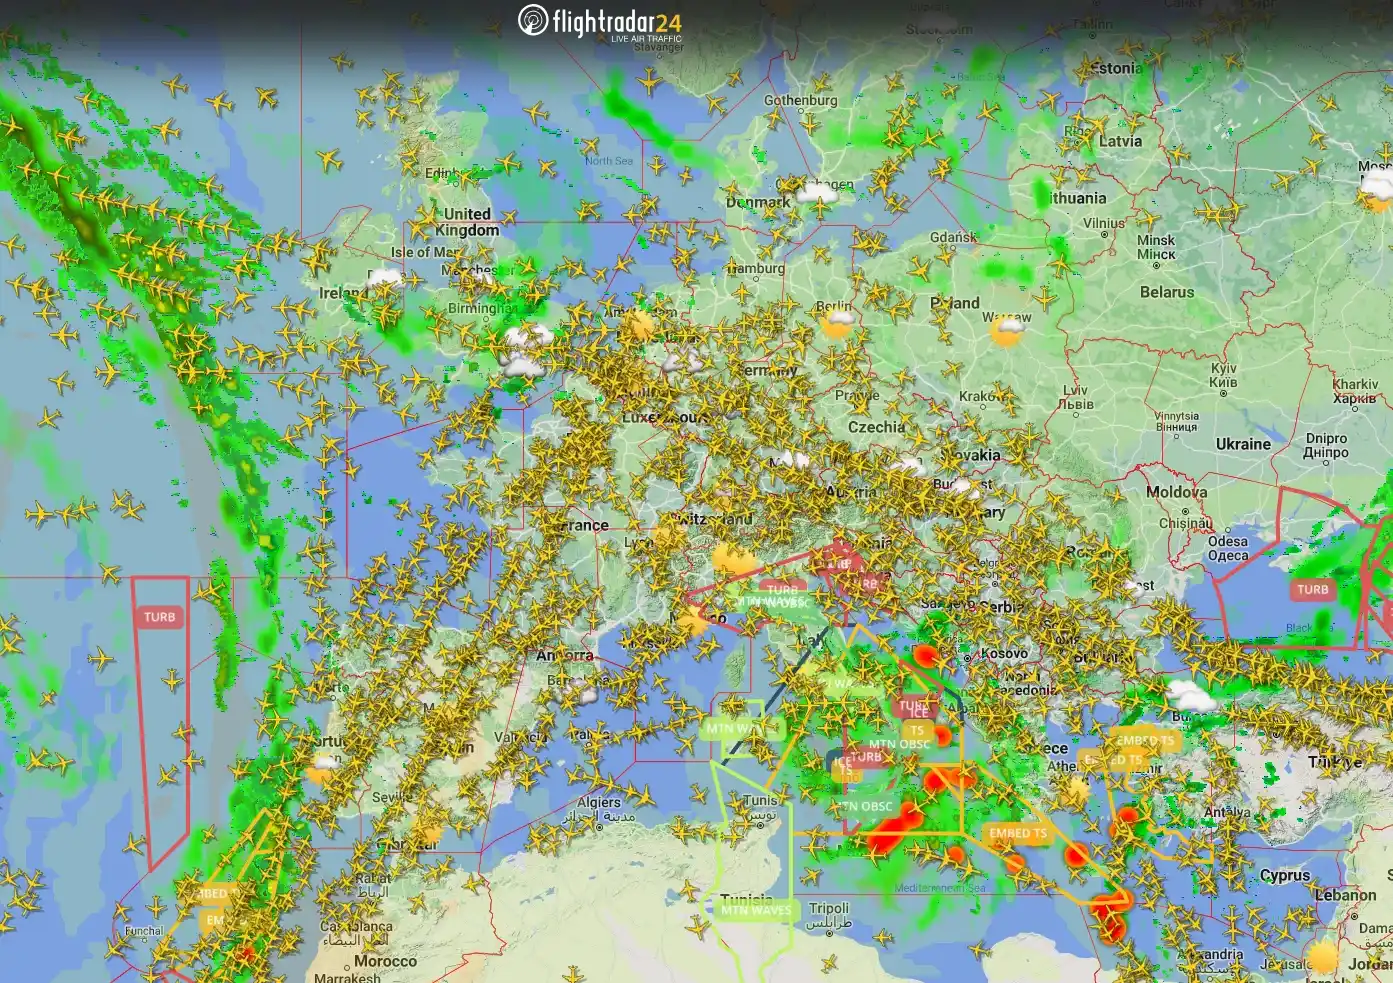
Activate, fill in your station’s latitude and longitude, verify the information, and you’ll get a confirmation message along with an email containing your sharing key and radar code. Your account, initially set to a free Basic tier, will automatically upgrade to a Business subscription once your station starts sending data to FlightRadar’s servers.And finally, the moment we’ve all been waiting for: see the aircraft detected by YOUR station. On FlightRadar, navigate to
Filters → Custom and select your receiver (in my case, it’s listed as T-LFBD111):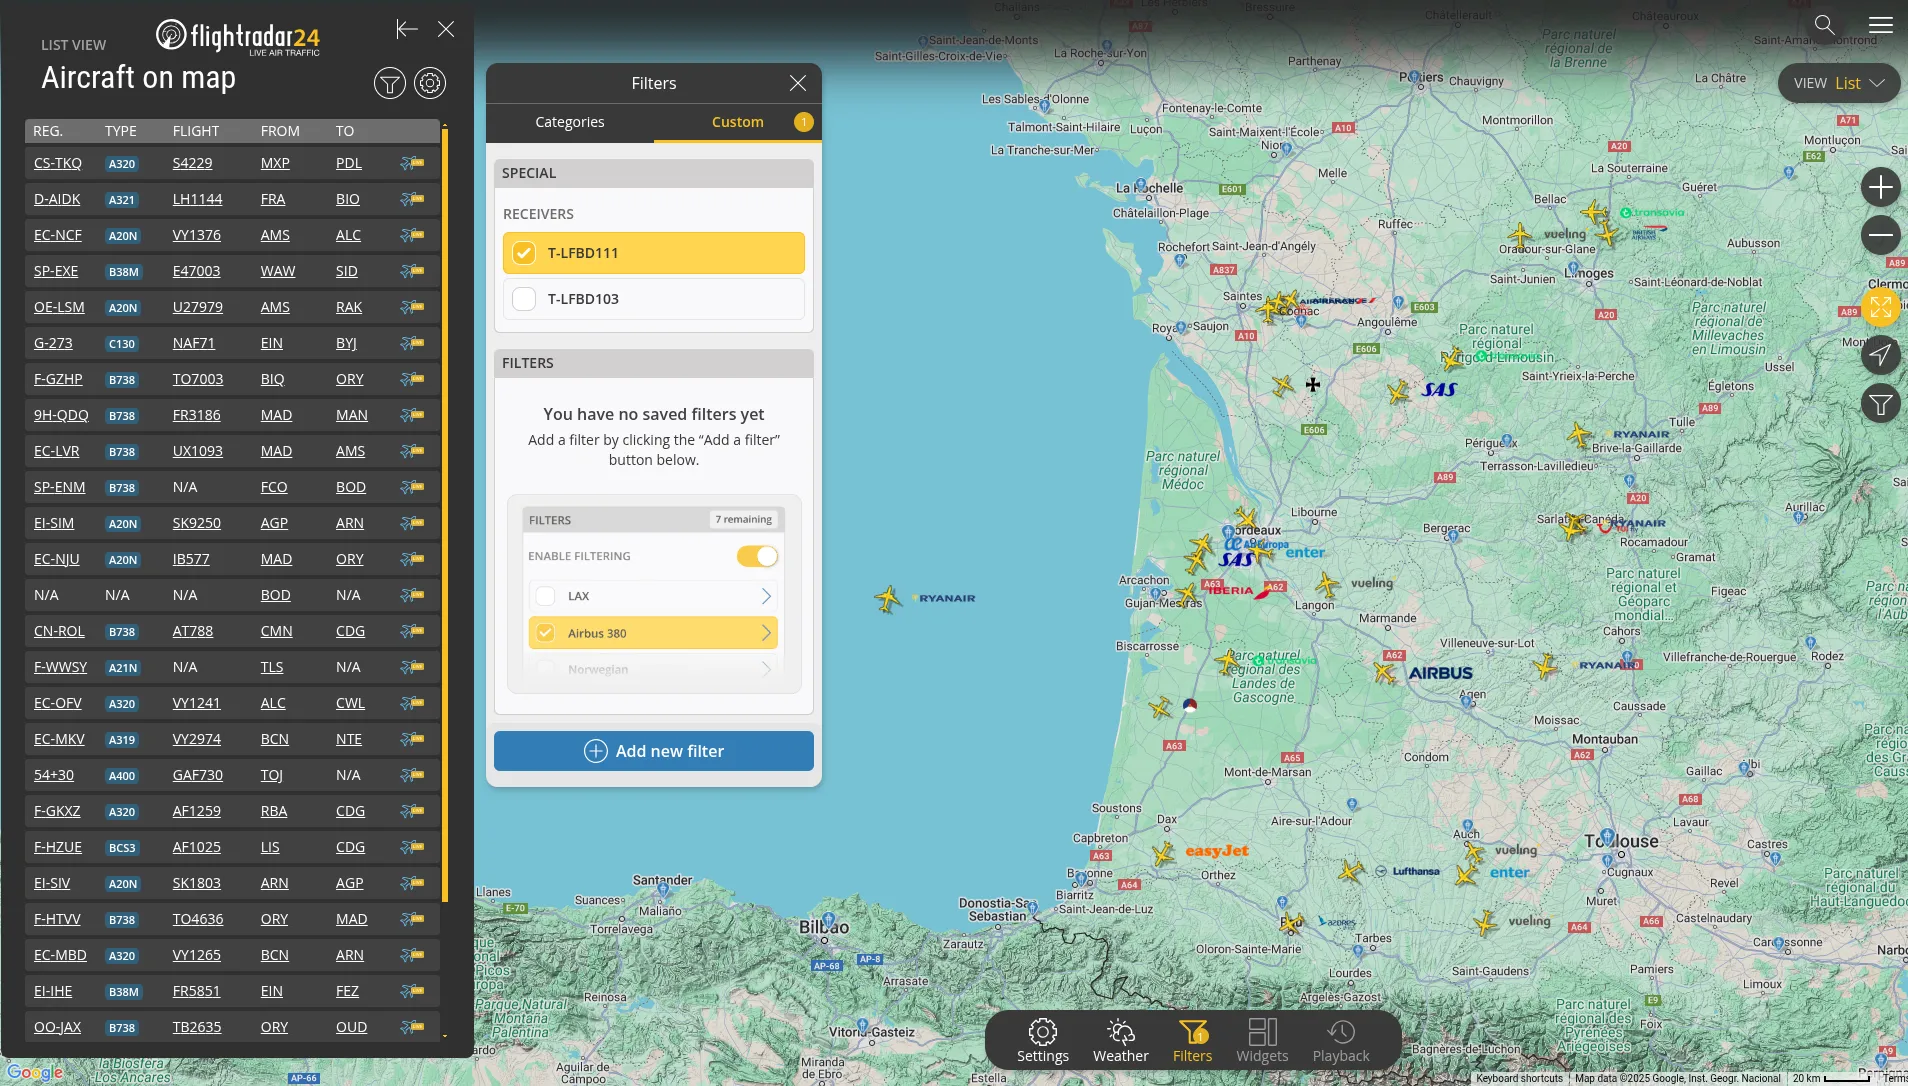
As you can see, the DIY antenna provides surprisingly solid coverage, even though its placement wasn’t perfect (I live roughly near where it says Gujan-Mestras). You can boost its performance with an LNA filter for the 1090MHz frequency or consider buying a commercial antenna, but for now, this setup works just fine.