The raw signals we want to transmit are often weak and can attenuate significantly over long distances. By modulating our signal, we can carry the information on a much more powerful wave 💪🏽.
Although transmitters generally agree on using different frequencies, modulation helps prevent interference by keeping the signals from mixing.
Modulation
Imagine you have a signal to transmit, say, audio. We'll call it the modulating signal. This type of signal is low-frequency and very weak.
To carry it, we need another signal, the carrier wave, which has a high, powerful frequency. This is what actually carries our weak signal.
By superimposing these two signals (maths behind it), we obtain our modulated signal. There are several ways to do this, and as an example, we’re going to look at the simplest type: amplitude modulation.
Amplitude
The amplitude of a signal represents its maximum height relative to its rest position. It’s essentially the "power" of the radio signal.
This value is crucial for determining the quality of the modulated signal. In theory, the higher the amplitude of the modulated signal, the better the reception quality, because it makes it easier to distinguish the useful signal from ambient noise.
In amplitude modulation (AM), we vary the amplitude of the carrier wave depending on the amplitude of the modulating signal.
To demonstrate, we’re using a well-known software called GNURadio.
It’s totally fine if you’re not familiar with how it works. Essentially, it lets you manipulate radio signals using interconnected blocks.
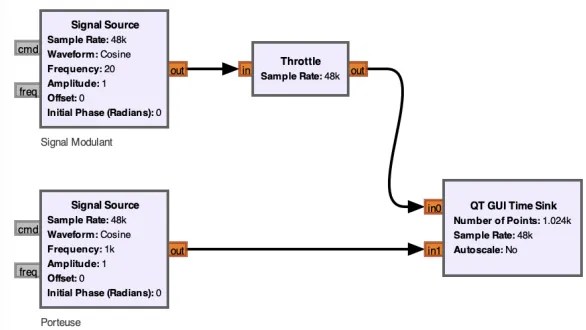
Here, you place two Signal Source blocks to generate a signal, one for the modulating signal with a frequency of 20Hz and another for the carrier wave with a frequency of 1000Hz (much higher than the modulating signal).
The Throttle block isn’t critical for this lesson, it’s there to prevent your PC from crashing by limiting the rate at which the CPU processes the program. One instance placed anywhere is enough, that’s why there’s only one. Anyway, back to what matters.
The QT GUI TIME SINK block lets us visualize the two signals over time.
Here’s what you get when you run the program:
You can see our two neat sinusoids: the red one is the carrier, and the blue one is the modulating signal.
Amplitude Modulation
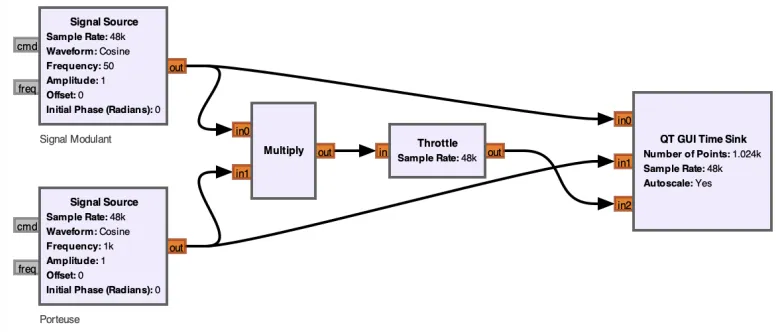
Next, we superimpose our two signals by multiplying them (check out the math behind it).
Here, we simply added a Multiply block and route the modulated signal to our QT GUI Time Sink. I also left the other two signals connected to the sink for a clearer understanding. Similarly, you can ignore the Throttle block.
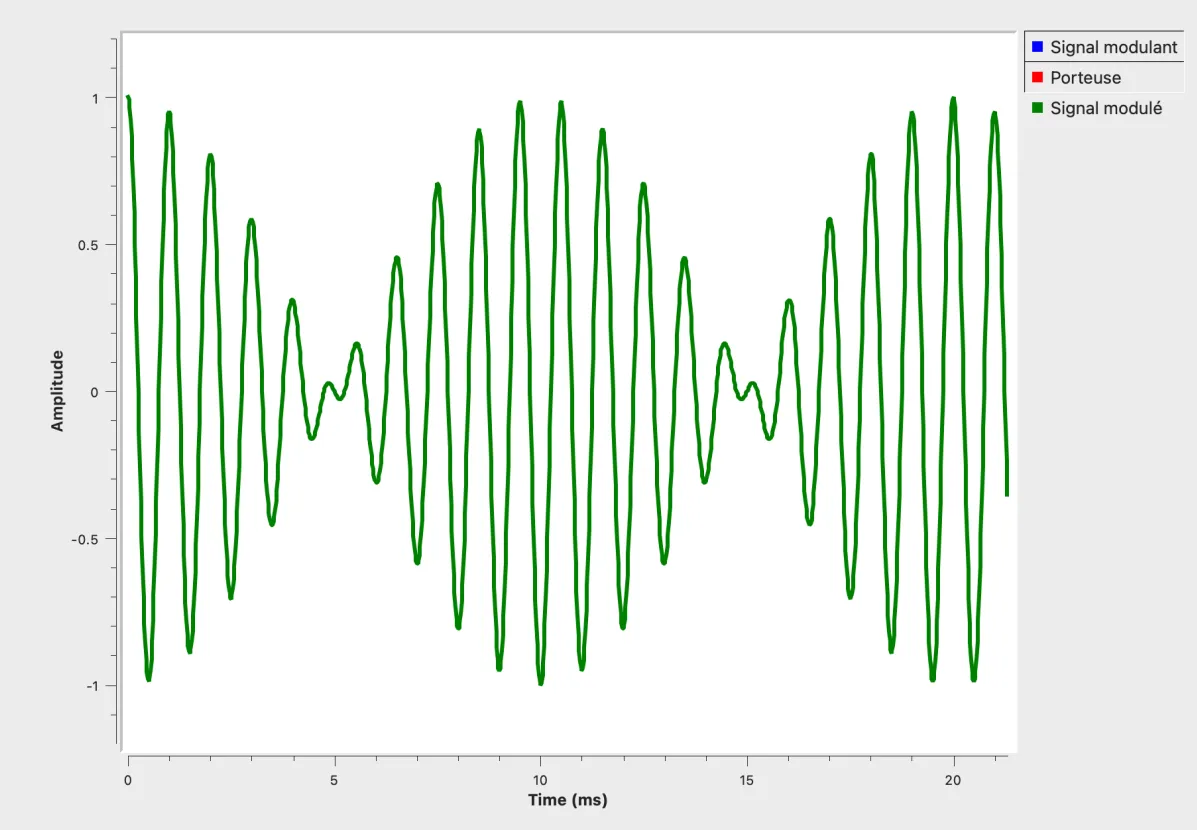
Now, let’s run the program and display only the modulated signal to see what it looks like:
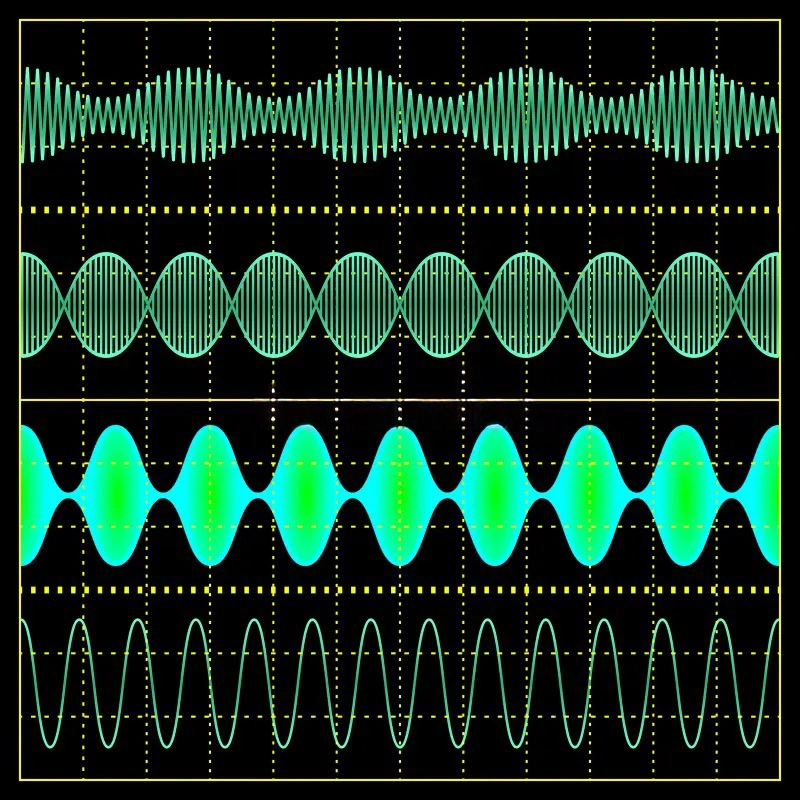
You can see the characteristic shape of an amplitude-modulated signal.
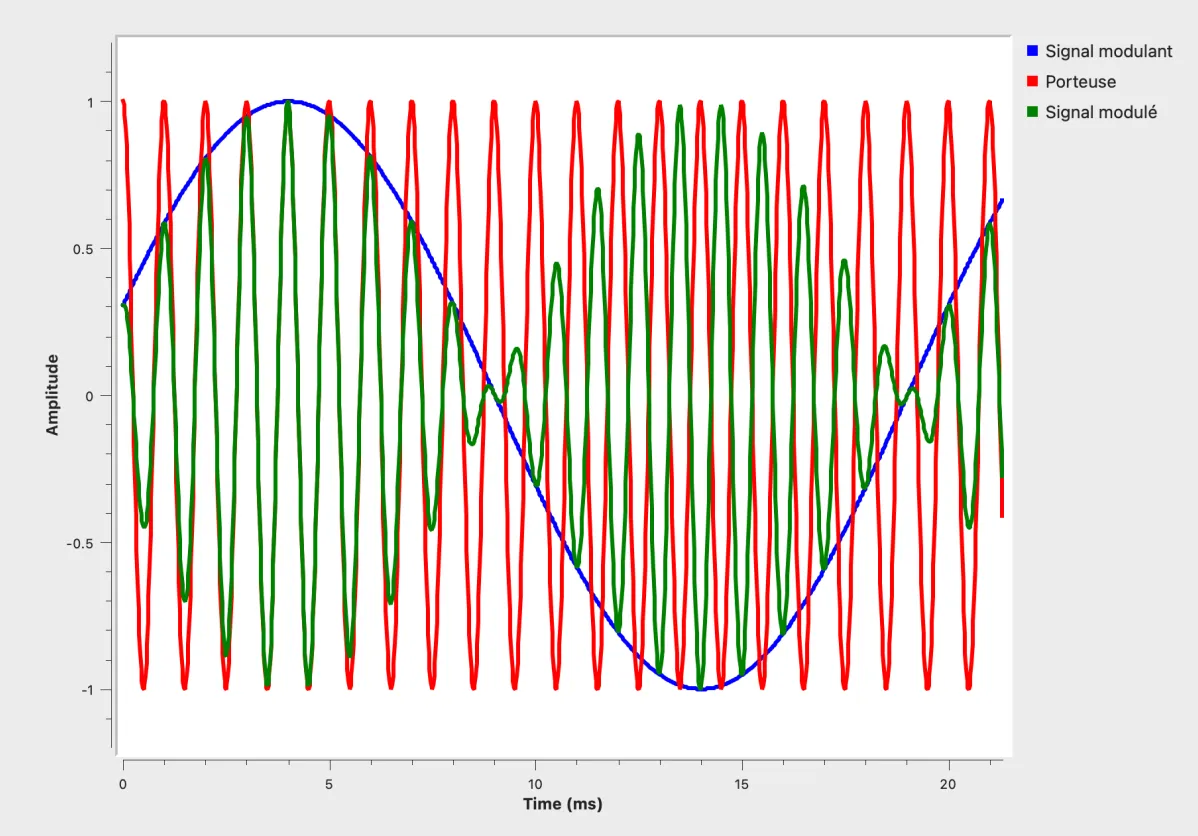
And now, let’s display all three signals (modulating, carrier, and modulated):
It becomes clear that as the amplitude of our modulating signal decreases, the amplitude of the carrier drops accordingly.
That’s it for this simplified lesson on amplitude modulation. There are many other modulation types (FM, PM, ...) chosen based on what you’re transmitting, your available bandwidth, the ambient noise, etc., but we’ll save that for another time :)